I am always searching for better ways to do waistband ends as they never look right. By that I mean they aren't perfect 90 degree angles with a nice flat and even look to them. What I usually end up with is a lumpy uneven looking waistband with all the hallmarks of poor construction.
I had a 1950's wool Skirtmaster skirt from Sydney that I knew was fairly well constructed and I have seen many other examples of this brand over the years of thrift shopping and they always seem to be wool and well made, even once they have ended up at the thrift shop.
So i decided to take it apart and have a look at how they achieved the "quite good" waistband ends.
 |
| This is of the outside of the underlap of the WB. I have removed the
edge stitching and also where the button was positioned in the center.
|
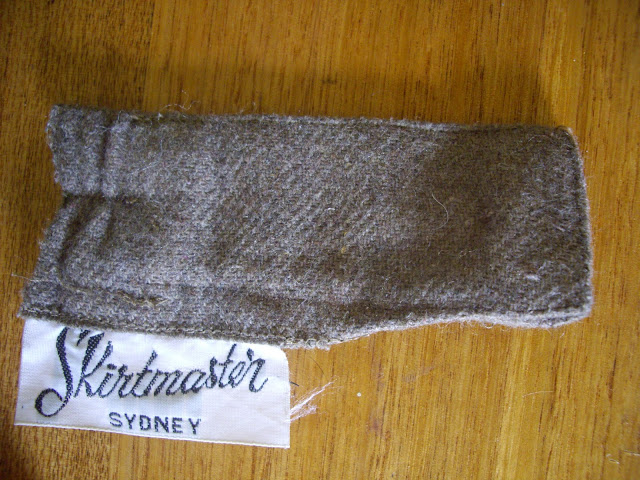 |
| This is the inside of the underlap and you can see the skirt master label. |
 |
| RS of the WB is sitting on the table and you can see the dark grey fusible interfacing and to the left is the bottom of the belt loop and just above it is the black elastic that was just in a back portion of the WB. |
 |
| This is the underlap end before I took out the interfacing to see how the ends had been folded in during construction. |
 |
| red lines indicate where the fold lines have been. Notice how the full SA on the end is not trimmed and the folds on the corner are at approx a 30 degree angle. Next task is try and work out how the managed to edgestitch the end of the underlap from the RS of the WB without having first sewn the seams. hmmmm.. please leave a comment if you have any inside information at all regarding this issue! |


Comments
Post a Comment